Showing posts with label cookie. Show all posts

Sunday, January 18, 2015

Pastry School Recap | Units 10/13/15 Plated Desserts

Something about plated desserts feels classy and elite to me. If I were to feel like a true pastry chef, I feel like I would have to master the art of these. However, I doubt I would ever work in the pastry kitchen of a restaurant. So, our dessert menu project from pastry school will have to suffice for life experience.

We had three units of individual plated desserts. Three! That is a lot, and I think most of us were a little sick of them by the end. I could fill pages of this blog with photos of visually stunning dessert plates, but I'll stick with the ones I concocted for our dessert menu project, for which I created my imaginary dessert restaurant, Spiked, featuring cocktail-inspired desserts.

(Disclaimer: Again, neither this restaurant nor the URL is real.)

From my menu, the chef selected the Margarita and the Rum & Coke for actual presentation and taste-testing. 

The Rum & Coke was intended to be a glass full of brown sugar rum ice cream sandwich cubes, coated or sprinkled with chocolate pop rocks, with a side of sour cherry compote and cherry cola sorbet. Unfortunately, the classroom fridge and freezer blew out the night before presentation, which melted everyone's ice cream. So in a pinch, I remade the rum ice cream and scooped it into the cup, sprinkled with chocolate pop rocks, and inserted a chocolate tuile straw for decor. Tastewise, it was still a success!
The Margarita was my favorite, and is also the concept that inspired my recent eggnog bombe. This dessert is a citrus tequila mousse bombe with Grand Marnier crème brûlée and a lime cookie. On the side is an orange tequila sauce, lime cookie crumbs, crème anglaise and a candied lime.
 Please excuse the iPhone photos! That's all I had available in class.

Friday, February 14, 2014

Pastry School Recap | Unit 7 - Petits Fours (Happy Valentine's Day!)

Happy Valentine's Day! To celebrate, I made some white chocolate and raspberry macarons. The white shells were a little more successful than the pink ones, which I over-deflated a bit, but both should be yummy to share with friends on a trip to Carmel this weekend.
To be honest, the hype and reverence around French macarons make me a little less excited about making them. That is probably why this is the first time I've made them at home (outside of class). However, I do think they are delicious treats, and no doubt big money-makers for bakeries (I almost always grab one when I'm at a Bouchon Bakery)!

Conceptually, petits fours are the most interesting to me. I love the idea of shrinking down desserts, and although it may be too labor-intensive, I could imagine having a bakery specializing in innovative petits fours. The French translation of petits fours is "small ovens" and the term refers to bite-sized desserts. The two dessert types are glacé (glazed, such as the ones you see in Swiss Colony catalogs), and sec (dry, such as macarons, meringues and biscuits). I believe there is also the savory type, salé (salted), for appetizers.

Some examples of petits fours from Unit 7:
Hazelnut Financiers:
 Pâtes de fruits: raspberry and passion fruit jellies
Sablés: swirl cookies
 Unit Exam: fruit jellies, Russian tea cakes, passion fruit barquettes, lemon-raspberry sandwich cookies, raspberry macarons, cat's tongues, nougat, madeleines

Monday, November 25, 2013

Pastry School Recap | Unit 1 - Tarts & Cookies

Since I’ve been so delinquent in posting about pastry school, I’ve decided that in addition to recapping the experience, I should also recreate something representative of each unit. 

Here is “Unit 1 - Tarts & Cookies”, a.k.a. learning how to multi-task and break bad habits. During this first unit, we learned three basic tart doughs (pâte brisée (flaky), pâte sucrée (sweet), pâte sablée (sandy/shortbread)), a multitude of custards and other fillings, and the basics of finishing and decorating a tart. Cookies could almost be considered a filler topic, but they were a perfect fit for this unit considering the similar techniques for mixing and baking. 

To pay homage to this unit, I decided to see what happens if I take a traditional nut tart (tarte aux noix) and convert it into empanadas. The nut tart we made in class consists of pâte brisée dough formed in a tart ring, lined with raspberry jam and sliced almonds, and baked with a nut flour filling (almond cream, hazelnut and almond flours, French meringue). This was actually the tart I received on my unit exam (on the left):
For the empanadas, I rolled and cut the dough into 4-5" circles, spread the jam and sliced almonds, and then folded and sealed the empanadas with the nut flour filling inside.
Someone should make this into the next cupcake or macaron fad and call it "Sweet 'Nadas". Just a thought! 
I baked these at 350˚F for about 30 minutes. The filling poked out on a couple empanadas, but otherwise the end result was better than I expected! The crust was flaky and buttery, the sliced almonds had a nice crunch, and the filling retained the nut tart's depth of flavor from the nut flours and tangy raspberry jam. In fact, the taste of this might have been even better than the nut tart since each bite had two layers of flaky crust and raspberry jam instead of one.
Getting back to pastry school itself, what was our crash-course introduction to pastry school like? Well, here is my vague, but I think accurate, recollection of Unit 1 - Tarts & Cookies:

Each night of Tarts & Cookies, we had to complete two, three, even four desserts, all in progress simultaneously. Accomplishing this required doing our homework (assigned reading on techniques and recipes), coming to class prepared with an understanding of the steps that would have to be accomplished during the 5-hour class period, keeping track of tasks and timing, learning to prioritize when inevitably we fell behind schedule, somehow always maintaining a clean tabletop . . . and at the same time learning about food safety and handling in order to obtain our ServSafe certification. 

Let's not forget the most important task: following Chef's instructions, or risk getting yelled at. This last part is a lot harder than you would think when you have all of the above to keep in mind and are asking yourself things like: "Does mixing on "low speed" mean speed 2 or 3? Does it matter? How exactly do I turn the bowl with my left hand while folding with my right hand? How far do I turn the bowl, 90˚ or 180˚? Do I zest a lemon by holding it on top of the microplane and moving the fruit back and forth, or the other way around? What does Chef mean to 'bake until it's done'? When is something 'done'? Am I the only person thinking this? Do I look stupid?"

The lesson I learned at the end of the day is, stop wasting time thinking about these silly things and just start doing. Chef will certainly correct me if I'm screwing up. And, at the end of the day, once I started understanding the technique and developing a "baker's instinct", what really mattered was just doing what was effective, efficient, and least likely to give me carpal tunnel syndrome ;)

A few of my favorites from Unit 1:
Apple Tart (Tarte aux Pommes): Made during the first two nights of class! Pâte Sucree crust, apple compote, sliced apples and nappage glaze.
Fresh Fruit Tart (Tarte aux Fruits Frais): pâte sucrée crust, pastry cream filling, fresh fruit and nappage glaze.
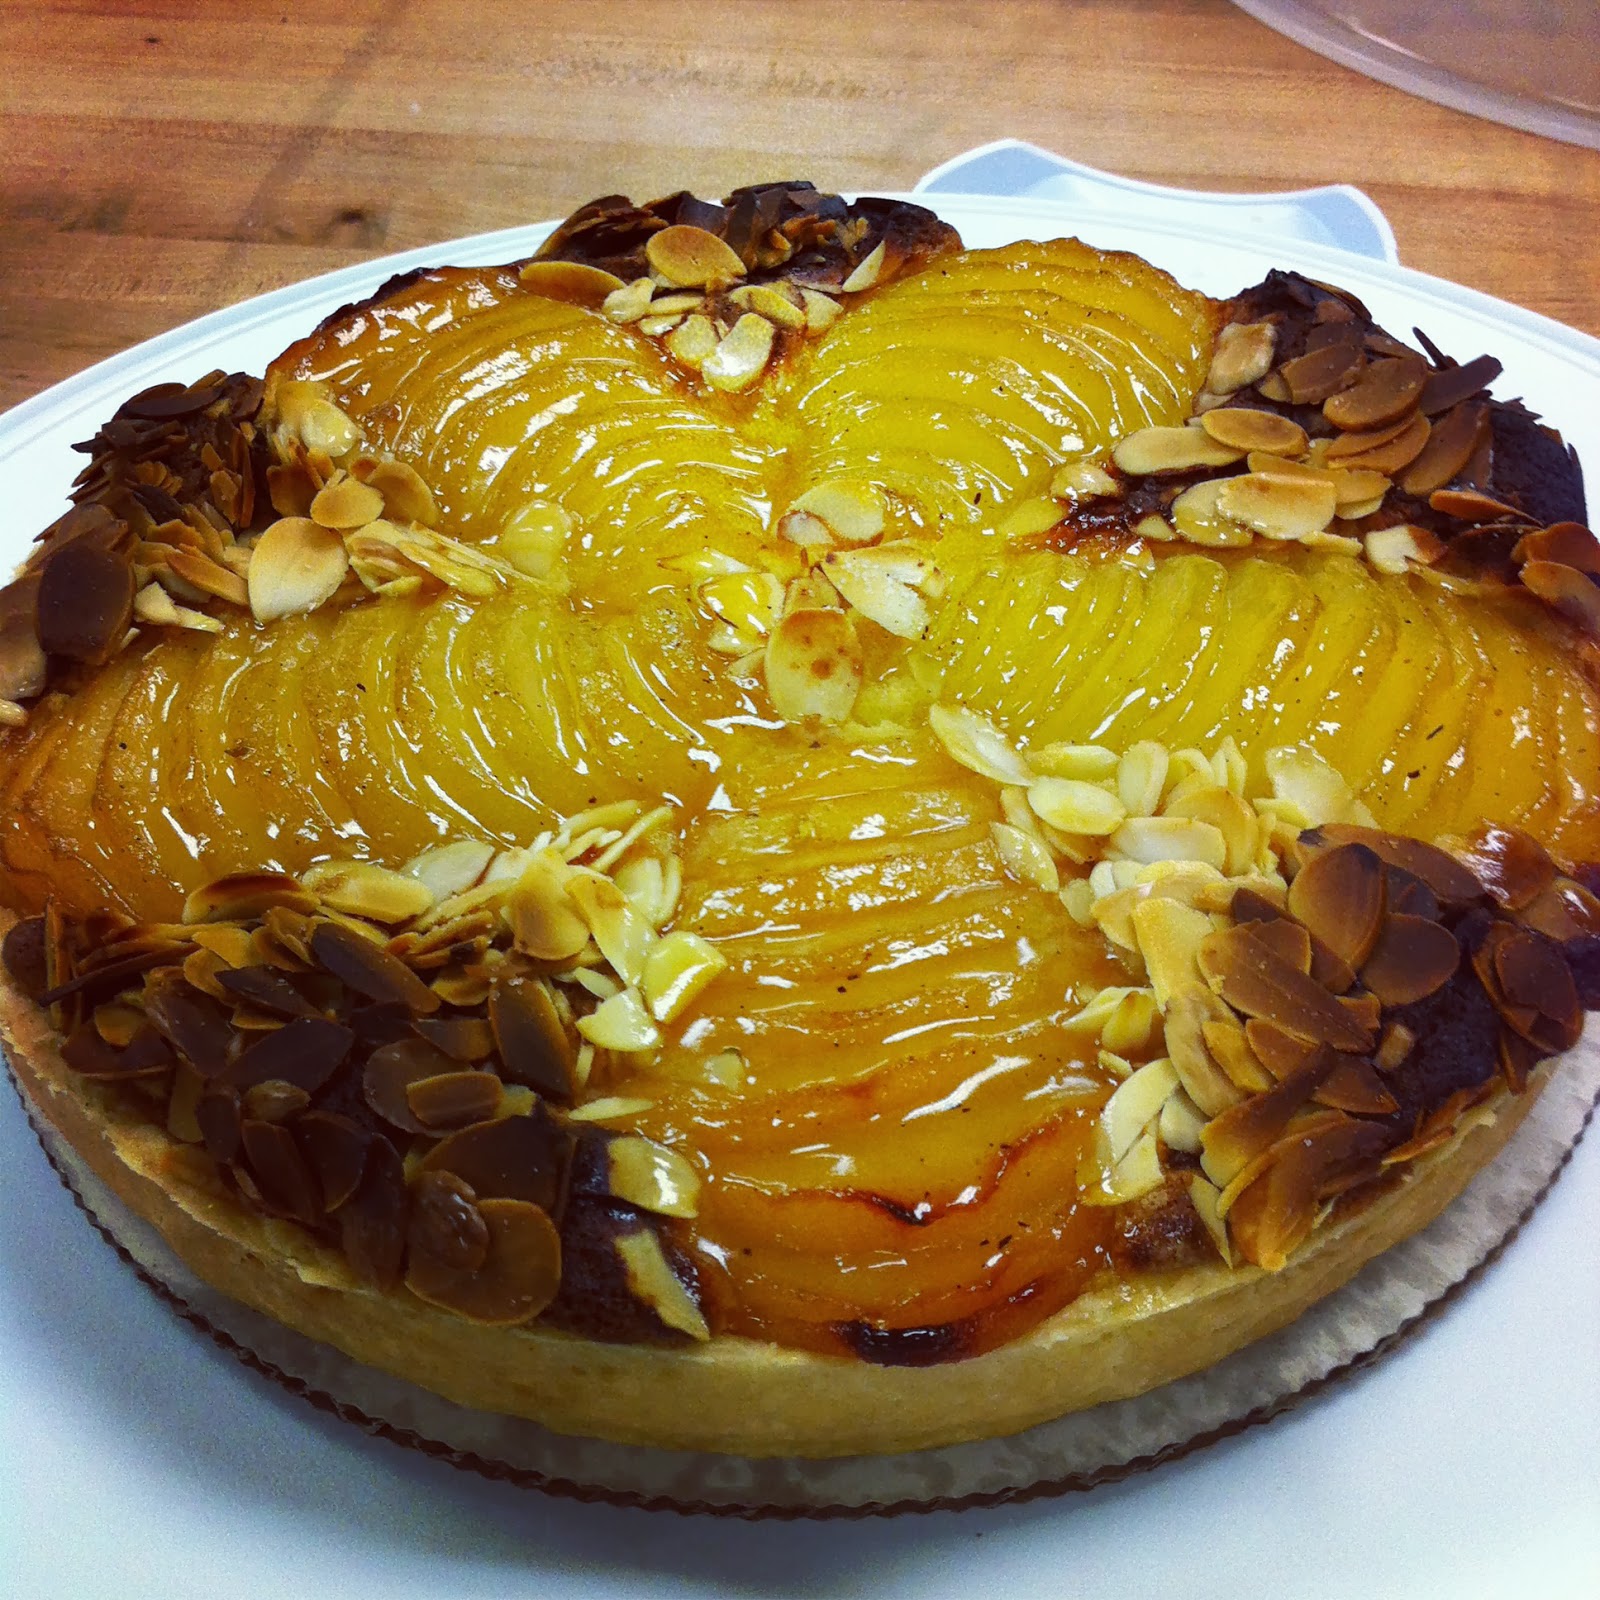
Pear and Almond Tart, Bourdaloue Style (Tarte Bourdaloue): pâte brisée crust, almond cream filling, poached pears, sliced almonds and nappage glaze.
Fig Newtons!

Friday, September 14, 2012

Apricot Chocolate Oatmeal Cookies

This is a great companion cookie for the Oatmeal Craisin White Chocolate Cookie, and uses a similar recipe, with dried apricots replacing the craisins, and semi-sweet chocolate (chips, and exterior dipping) replacing the white chocolate. The original recipe from Food & Wine uses much higher butter/sugar to flour/oatmeal ratio than the craisin recipe, which makes the cookie spread and get a bit thing. I've adapted it to be somewhat closer to the craisin recipe.
Adapted from Food & Wine Annual Cookbook 2011:

Ingredients
  • 2 cups old-fashioned oats
  • 1 ½ cups flour
  • ¾ cup butter, softened
  • 1 cup brown sugar
  • 2 large eggs
  • 1 teaspoon baking soda
  • ½ teaspoon salt
  • 1 teaspoon vanilla extract
  • 1 cup pecans
  • 1 cup dried apricots, cut into ¼-inch dice
  • 1 cup semi-sweet chocolate chips
Directions
  1. Preheat oven to 350ºF. 
  2. Bake the pecans until lightly toasted (about 8 minutes). Once cooled, chop coarsely.
  3. Mix the oats, flour, baking soda and salt in a small bowl.
  4. Using a mixer, beat the butter and sugar until light and fluffy. Add the eggs and vanilla and beat until blended. Beat in the dry mixture until just incorporated. 
  5. Fold in the dried apricots, toasted pecans and chocolate chips.
  6. Drop by rounded tablespoons onto lined cookie sheets (parchment paper or nonstick foil), spaced at least 1-2 inches apart. Bake for about 16 minutes until lightly browned. Let cool and transfer to wire rack.
  7. Drizzle with or dip in melted semi-sweet chocolate. 
These cookies will expand more than the craisins recipe.

Saturday, July 7, 2012

Oatmeal Craisin White Chocolate Cookies

Oftentimes, recipes on the back of boxes / packages can be rather mediocre, having been dumbed down to be accessible to the general public. This one, however, despite its simplicity, is a home run. It's quick and easy, and most people seem to love the taste, even if they are not particular fans of oatmeal cookies, craisins, or white chocolate.

Adapted from Ocean Spray® Craisins® package:

Ingredients

  • ⅔ cup butter, softened
  • ⅔ cup brown sugar
  • 2 large eggs
  • 1 ½ cups old-fashioned oats
  • 1 ½ cups flour
  • 1 teaspoon baking soda
  • ½ teaspoon salt
  • 6 oz. dried cranberries (i.e. Ocean Spray® Craisins®) - Note: I would use 1 to 1 ½ cups.
  • ⅔ cup white chocolate chunks or chips - Note: I would use 1 to 1 ½ cups.
Directions
  1. Preheat oven to 375ºF.
  2. Using a mixer, beat butter and sugar together in a medium mixing bowl until light and fluffy. Add eggs, mixing well. Combine oats, flour, baking soda and salt in a separate mixing bowl. Add to butter mixture in several additions, mixing well after each addition. Stir in dried cranberries and white chocolate chunks.
  3. Drop by rounded teaspoonfuls onto ungreased cookie sheets. Bake for 10-12 minutes or until golden brown. Cool on wire rack. 
  4. Drizzle with melted white chocolate for extra flair and flavor.
Most of the sweetness and flavor for this cookie comes from the dried cranberries and white chocolate, so be liberal with those ingredients. In addition, note that these cookies expand very little in the oven. I would flatten them slightly before baking. No need to worry about the cookies running into each other as they bake.