Monday, February 10, 2014

Pastry School Recap | Unit 3 - Puff Pastry

I love puff pastry. Maybe because, like pâte à choux, mechanical leavening is involved. In class, we made paillettes, or twisted straws, flavored either with cinnamon sugar, or cheese and spices. However, I was never quite satisfied with the version we made in class, for reasons I'll explain below. Fortunately, last Christmas when I went home to Orange County, I came across a new bakery in Brea, CA called Merely Sweets. To my pleasant surprise, I discovered on their website that the owner is a graduate of the New York campus of my school (f/k/a French Culinary Institute)! No wonder I seemed to recognize most of the desserts in the shop, including cinnamon twists that looked much better than what we made in class.

I was inspired to experiment with new methods to achieve the fatter and more robust twists that Merely Sweets had. I think the result, as seen in the photo above, was much more successful than the ones from class (see photo below).
Instead of twisting a single strip of puff pastry dough upon itself as done in class, which I think overworks the dough and results in a harder, denser stick, I cut a longer strip, put the flavoring on one side, folded the strip on itself, and then twist the folded strip. Then, I sprinkled the outer surface with turbinado/raw sugar for extra flavor and crunch. (You can do the same thing with cheese and spices too.) The problem with twisting a single strip upon itself is that on one hand, you want to twist it tightly enough to hold its twisted shape while baking (instead of unraveling), and on the other hand, you want it twisted just loose enough to give the stick some room to puff up. It just doesn't quite work out and the exposed flavoring also tends to burn.

On the whole, puff pastry might have been my favorite unit of pastry school. Learning the technical side of puff pastry demystified the pastry and made so many diverse desserts accessible to me. It takes some amount of work to prepare the dough, and a whole lot of waiting time in between turns of the dough (rolling and folding the dough), not to mention the long waiting time for the dough to chill. But once the dough is made, it's like a versatile, magic play-dough.

Some examples from Unit 3:
Napoleon Strip: my favorite dessert
Gâteau Pithivier: puff pastry filled with frangipane (a pastry cream / almond cream mixture)
Vols-au-vent: classic hors d'oeuvre vessel for sweet and savory fillings
Fruit Strip (bar tart): fresh pineapples and ground pistachios
Caged Poached Pears:
Apricot Galette:
Chocolate Palmiers: displayed only for demonstrative purposes; I otherwise never recommend making or eating chocolate puff pastry (not tasty)
Apple Dartois: apple compote in a lattice
Unit Exam: round napoleon, vols-au-vent, apple galettes

Tuesday, February 4, 2014

Ginger Mochi Cannelés - Happy Chinese New Year!


These little cannelés are chewy little bites of gluten-free cake, dipped in a ginger simply syrup and topped with sea salt and candied ginger. I first read about these on the Hungry Rabbit blog and meant to make them for a potluck a year ago. However, I was busy with work and pastry school and I never got around to making them (or attending that potluck). This year, I finally made them to ring in the year of the horse, but again I was unable to make it to the Chinese New Year gathering where I intended to share these with friends.

So, I guess I will eat most of them myself :)

These are a play on the traditional nian gao (rice cake) eaten to celebrate the holiday. If you're expecting an actual nian gao, this is not it. It won't be glutinous. However, it is definitely chewier than any typical cake, and because it's made with rice flour and mochiko, it's gluten-free. I'm not a huge ginger fan, but these smelled and tasted delicious out of the oven, and I feel like the flavor balance has even improved over the last couple days.

The original recipe from Hungry Rabbit lists "vanilla extract" twice. I'm not sure if that's a mistake, but I don't think it makes a huge difference. You can use vanilla extract twice, or try almond or ginger extract in addition to vanilla extract.
Ginger "Nian Gao" – Ginger Mochi Cannelés

Ingredients
Makes 64 cannelés (using 1-oz mold)
  • 10¼ ounces (2/3 box) Mochiko flour
  • 1 cup rice flour
  • 1 teaspoon ground ginger
  • 1/8 teaspoon ground cinnamon
  • 16 tablespoons (8 ounces/2 sticks) salted butter, softened
  • 1 cup granulated sugar
  • 1 can (14 oz) sweetened condensed milk
  • 1 can (12 oz) evaporated milk
  • 3 tablespoon ginger, freshly grated
  • 1 teaspoon pure vanilla extract
  • 1 teaspoon pure vanilla extract
  • Ginger syrup (see recipe below)
  •  cup crystalized candied ginger, finely chopped
  • Sea salt, for sprinkling
Directions
  1. Adjust oven rack to lower-middle position and heat oven to 350℉. Spray two 1-oz silicon cannelé molds with cooking spray and place them side-by-side on a baking sheet. Set aside.
  2. Whisk together mochiko flour, rice flour, ground ginger and cinnamon, set aside.
  3. In a blender, add butter, sugar, condensed milk, evaporated milk, grated ginger and extracts. Blend on high speed until smooth and fully combined. (A stand mixer works too. The mixture will have little lumps, especially from the grated ginger, but the batter comes together just fine with the flour is added.)
  4. Pour milk mixture into a large bowl and whisk in flour mixture until fully combined with no lumps. 
  5. Fill each mold just below the top and gently tap the baking pan on the countertop a few times to release any air bubbles in the batter. Cover remaining batter until ready to use.
  6. Place baking sheet in oven and bake until golden brown, about 40 minutes. Make ginger syrup while cannelés are in the oven.
  7. When cannelés are done, remove from oven and release them from the mold immediately. Dip each cannelé in ginger syrup until fully coated, about 10 seconds; place them right-side-up on wire rack to cool.
  8. Repeat with remaining batter.
  9. Sprinkle with sea salt and top with chopped candied ginger.
Ginger Syrup

Ingredients
  • 1 cup water
  • 1 cup granulated sugar
  • 8 slices of ginger, freshly sliced
  • 2 tablespoons Canton, ginger liquor (optional)
Directions
  1. In a small sauce saucepan, combine water, sugar and ginger; heat over medium heat until sugar is dissolved and mixture comes to a simmer. 
  2. Remove from heat, add Canton, stir to combine and set aside until ready to use.

Thursday, January 16, 2014

Pastry School Recap | Unit 2 - Pâte à Choux

Pâte à choux, a.k.a. cabbage dough. The layperson usually does not recognize this term, so I also describe it as cream puff dough.

I love this stuff. And not just because it demonstrates the magic of mechanical leavening. Okay, maybe precisely for that reason. The dough is made of water, butter, bread flour, a bit of sugar and salt, and eggs. What distinguishes this dough from others is the fact that it is cooked twice: all ingredients except the eggs are first cooked over the stovetop, and then the eggs are beaten in one at a time to reach the right consistency and moisture. Bread flour has a higher protein content, allowing for greater moisture absorption (thus usually more eggs and flavor), and an elasticity from the gluten formation. During baking, the water content transforms into steam (which is up to 1600x in volume under STP conditions! nerd alert!), which puffs up the dough and creates a hollow inside that can be filled with whipped cream, pastry cream, ice cream or other fillings. Round mounds of dough when baked (i.e. cream puffs) have tops that look vaguely like cabbages, hence the French name.

This dough is so versatile and can make cream puffs, profiteroles, eclairs, gougeres, popovers, and even gnocchi! 
Yes, Parisian gnocchi (gnocchis à la parisienne), which are made by poaching the dough. I was inspired to try this after the evening culinary class prepared it for dinner one night. I overboiled some batches which made some pieces mushy, but on the whole it still turned out quite delicious with peas, cherry tomatoes, shaved parmesan cheese, and some simple olive oil, salt and pepper.

Some examples from Unit 2:
Profiteroles:
 Swans:
Unit Exam (Eclairs and Paris Brest):

Friday, November 29, 2013

Pumpkin Chocolate Mendiant - Happy Thanksgiving!

For Thanksgiving this year, I decided to present something along the lines of individual plated desserts versus a single cake. It was a lot more work, but a fun way to make use of my pastry school education. Plus, I needed to make up for the time that my pumpkin chocolate tiramisu failed to make it to the holiday gathering (in retrospect, that recipe I used was all sorts of wrong).

This dessert has a base disc of flourless hazelnut chocolate cake, a layer of pumpkin pastry cream, a layer of pumpkin-chocolate crème légère (basically the pumpkin pastry cream mixed with melted chocolate, frangelico and whipped cream), and a topping of mascarpone whipped cream. On the side is a cranberry compote, made with whole frozen cranberries, sugar, lemon juice, frangelico and a little corn starch to pull it together.

The dark chocolate cage was the most involved step. Fortuitously, my dad had 3" PVC pipe lying around, so we sawed that into short rings for holding the cylindrical shape while the tempered chocolate set. Family teamwork!

I'm only calling this a mendiant because that is the name of a similar dessert we made in pastry school. Obviously it is not the same as the chocolate confection also known as the mendiant, but I have yet to figure out a better name.

Monday, November 25, 2013

Pastry School Recap | Unit 1 - Tarts & Cookies

Since I’ve been so delinquent in posting about pastry school, I’ve decided that in addition to recapping the experience, I should also recreate something representative of each unit. 

Here is “Unit 1 - Tarts & Cookies”, a.k.a. learning how to multi-task and break bad habits. During this first unit, we learned three basic tart doughs (pâte brisée (flaky), pâte sucrée (sweet), pâte sablée (sandy/shortbread)), a multitude of custards and other fillings, and the basics of finishing and decorating a tart. Cookies could almost be considered a filler topic, but they were a perfect fit for this unit considering the similar techniques for mixing and baking. 

To pay homage to this unit, I decided to see what happens if I take a traditional nut tart (tarte aux noix) and convert it into empanadas. The nut tart we made in class consists of pâte brisée dough formed in a tart ring, lined with raspberry jam and sliced almonds, and baked with a nut flour filling (almond cream, hazelnut and almond flours, French meringue). This was actually the tart I received on my unit exam (on the left):
For the empanadas, I rolled and cut the dough into 4-5" circles, spread the jam and sliced almonds, and then folded and sealed the empanadas with the nut flour filling inside.
Someone should make this into the next cupcake or macaron fad and call it "Sweet 'Nadas". Just a thought! 
I baked these at 350˚F for about 30 minutes. The filling poked out on a couple empanadas, but otherwise the end result was better than I expected! The crust was flaky and buttery, the sliced almonds had a nice crunch, and the filling retained the nut tart's depth of flavor from the nut flours and tangy raspberry jam. In fact, the taste of this might have been even better than the nut tart since each bite had two layers of flaky crust and raspberry jam instead of one.
Getting back to pastry school itself, what was our crash-course introduction to pastry school like? Well, here is my vague, but I think accurate, recollection of Unit 1 - Tarts & Cookies:

Each night of Tarts & Cookies, we had to complete two, three, even four desserts, all in progress simultaneously. Accomplishing this required doing our homework (assigned reading on techniques and recipes), coming to class prepared with an understanding of the steps that would have to be accomplished during the 5-hour class period, keeping track of tasks and timing, learning to prioritize when inevitably we fell behind schedule, somehow always maintaining a clean tabletop . . . and at the same time learning about food safety and handling in order to obtain our ServSafe certification. 

Let's not forget the most important task: following Chef's instructions, or risk getting yelled at. This last part is a lot harder than you would think when you have all of the above to keep in mind and are asking yourself things like: "Does mixing on "low speed" mean speed 2 or 3? Does it matter? How exactly do I turn the bowl with my left hand while folding with my right hand? How far do I turn the bowl, 90˚ or 180˚? Do I zest a lemon by holding it on top of the microplane and moving the fruit back and forth, or the other way around? What does Chef mean to 'bake until it's done'? When is something 'done'? Am I the only person thinking this? Do I look stupid?"

The lesson I learned at the end of the day is, stop wasting time thinking about these silly things and just start doing. Chef will certainly correct me if I'm screwing up. And, at the end of the day, once I started understanding the technique and developing a "baker's instinct", what really mattered was just doing what was effective, efficient, and least likely to give me carpal tunnel syndrome ;)

A few of my favorites from Unit 1:
Apple Tart (Tarte aux Pommes): Made during the first two nights of class! Pâte Sucree crust, apple compote, sliced apples and nappage glaze.
Fresh Fruit Tart (Tarte aux Fruits Frais): pâte sucrée crust, pastry cream filling, fresh fruit and nappage glaze.
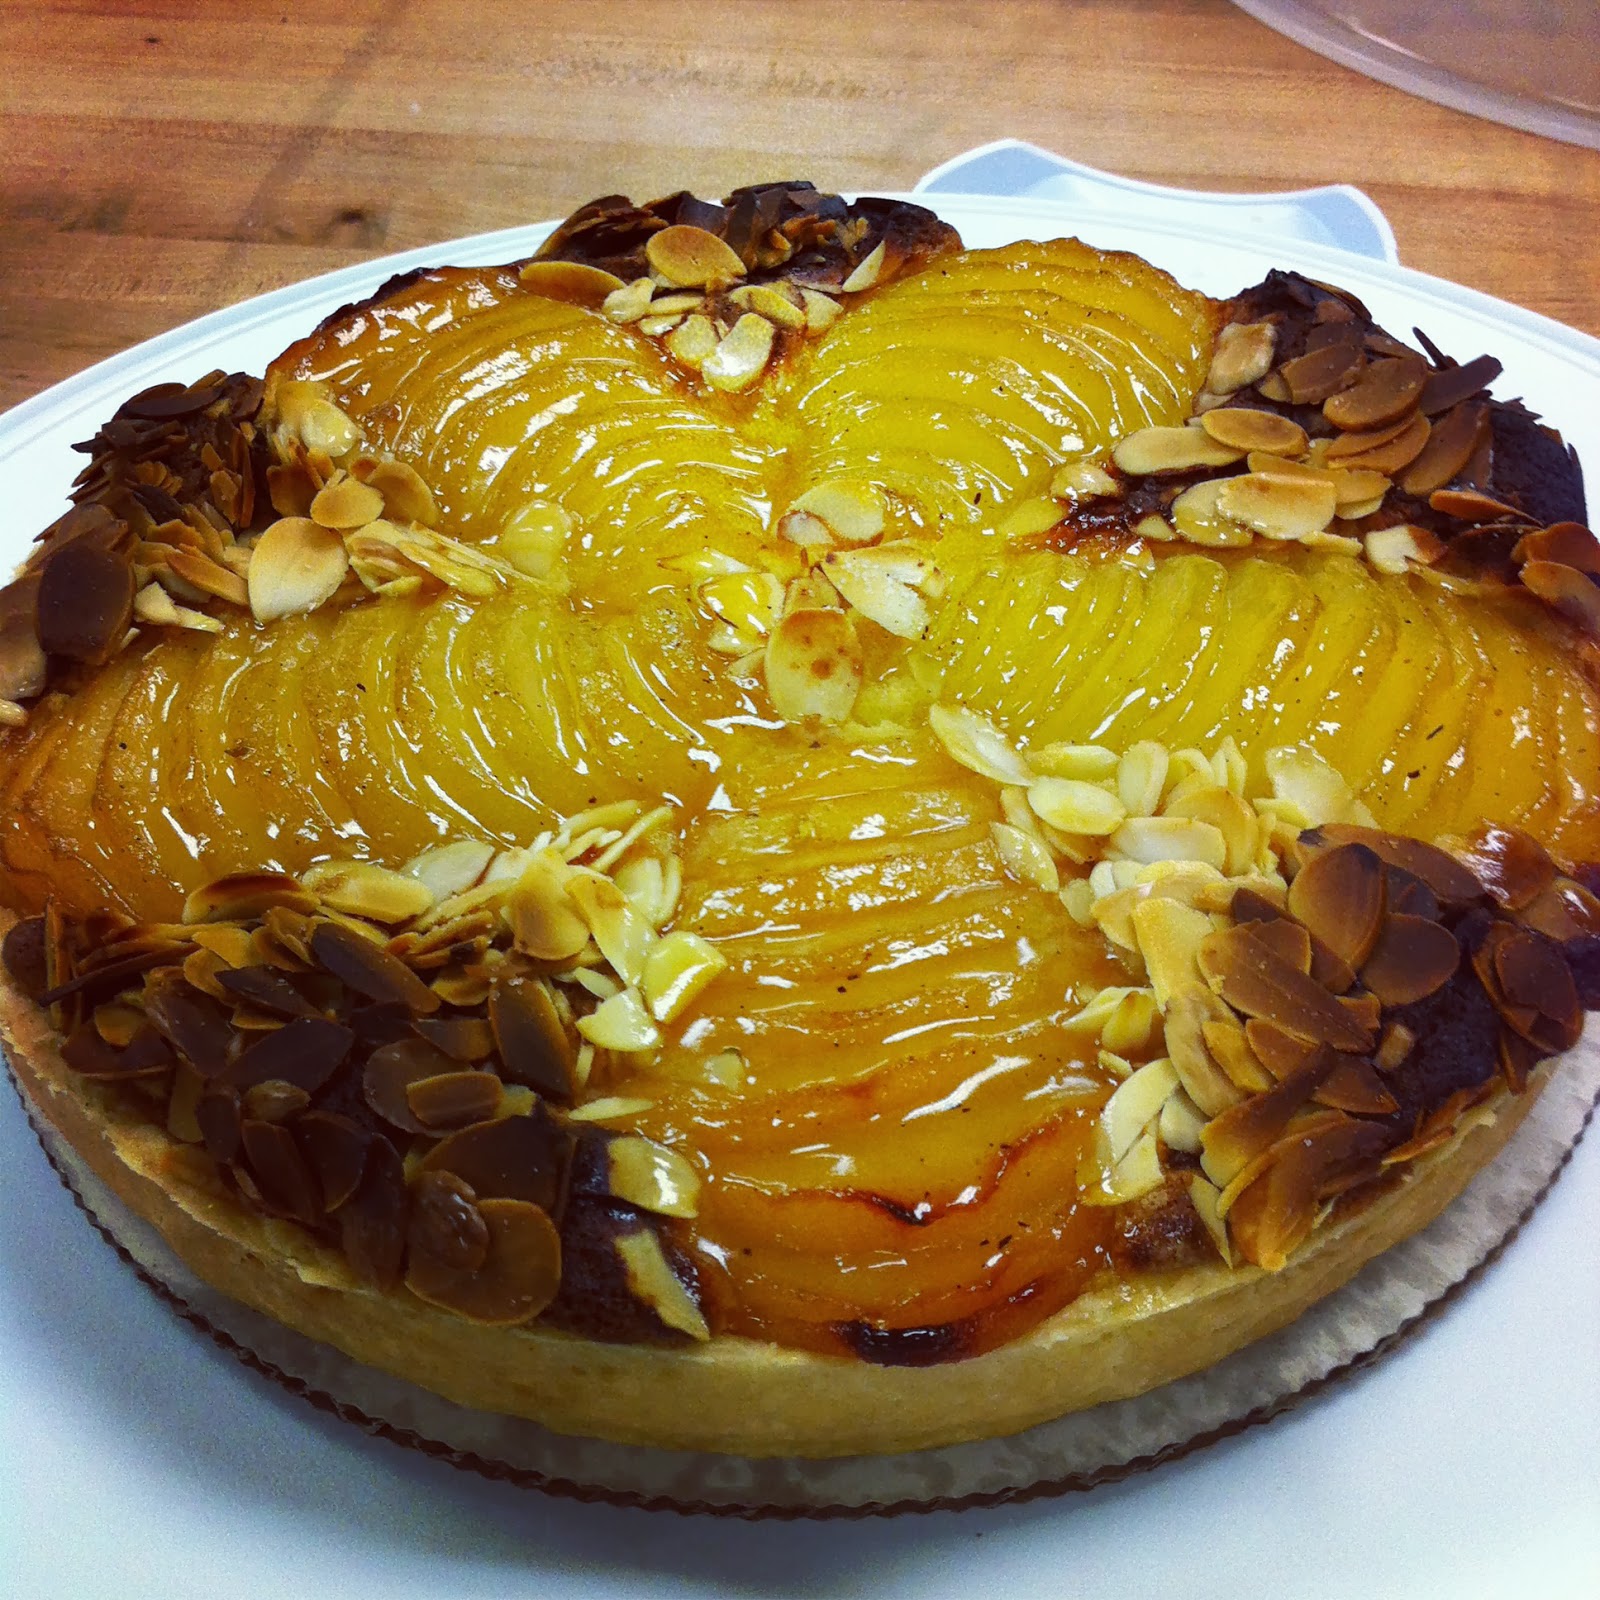
Pear and Almond Tart, Bourdaloue Style (Tarte Bourdaloue): pâte brisée crust, almond cream filling, poached pears, sliced almonds and nappage glaze.
Fig Newtons!

Milo | The Tahoe Adventurer

Milo has always been a great travel dog. He loves road trips, sticking his head out the window, and pretty much just going wherever I go because it sure beats bumming around on the couch. And I've always known he enjoys the outdoors (in his must-sniff-every-nook-and-cranny sort of way). But usually dirt hikes end up with burrs or pine needles stuck in his fluffy paws and plaintive looks up at me to spare him the discomfort and carry him the rest of the way.
So, I knew he would be enjoy a recent trip to South Lake Tahoe, but I was pleasantly surprised at the ease with which he jumped up and down rocks on a steep hike and eagerly splish-splashed into Eagle Lake. His cotton hair sure soaked up that water.

He couldn't wait to explore and his big black eyes weren't pleading with me to pick him upno, those accusing eyes looked back at me like I was holding him back from his adventure!
I'm proud of this pup and look forward to many more adventures ahead.

Monday, September 9, 2013

Pastry School - I'm a graduate!

On August 27, 2013, I received my diploma for completing the Classical Pastry Arts program at the International Culinary Center in Campbell, CA. In other words, I graduated from pastry school!

Over the course of 10 months, we learned the fundamentals, techniques and creativity that go into tarts, cookies, pâte à choux, puff pastry, viennoiserie and certain breads, cakes, petit fours, chocolate, sugar sculptures and plated desserts. I hoped to document the experience as I went, but life and work got in the way. Instead, I now hope to reflect back and recap the challenges and triumphs throughout the experience, and ultimately share the joy of it all.
The experience was a dream come true for me, the sort of thing where I used to say “man, if money didn’t matter, if social and parental expectations didn’t matter, and I pursued what I was passionate about, I’d go be a pastry chef.” Eventually, I got to the point where I asked myself, “why not?” Life is too short to watch days, months, years go by wishing you were doing something else. And as some of you know, when I choose to commit to something, I like to do it right and do it well. That is what brought me to ICC.

I knew that I would have to manage my own expectations. It was hard enough to be an attorney at a big law firm, with very little control over my workflow and schedule. Sometimes I would work more at night and over the weekends than I did during the day. Sometimes the long hours meant I didn’t sleep, and other times I twiddled my thumbs. I hadn’t taken a vacation in 2 years. Adding on ~20 hours a week of school (MWF 6-11pm, plus some reading and studying and the rush hour commute) was insanity. But as I learned in college, sometimes the more you have on your plate, the more focused and efficient you become. I just crossed my fingers, reminded myself that my happiness was just as or more important than year-end bonuses or perfect grades, and committed.

Crazy or not, this was the most personal and meaningful diploma of the 4 I now have (I do plan to stop . . . 4 is quite enough). I feel lucky and grateful to have been at a place in life where I could afford myself this opportunity. Was it worth it? Unconditionally, yes! Stay tuned folks, I look forward to telling you more about these past 10 months.