Thursday, December 11, 2014

Wedding | Congrats Tiffany & Jon!

A very belated post, but . . . This past July, Milo's Bonbons had the honor of appearing on my cousin's wedding menu! It was a whirlwind of a preparation for the wedding, but such a pleasure to cater desserts for Tiffany's and Jon's celebration.
 
My cousin asked for salted caramel chocolate cupcakes and lemon bars. Believe it or not, it was my first time making lemon bars! I probably should have experimented with that a little more, as I wasn't perfectly happy with my crust to filling ratio, but it's hard to go wrong with the flavor. I made both lemon and and lemon-cherry swirl bars as a nod to the wedding colors.
To give the desserts a little something extra, I decided to present the cupcakes and lemon bars on a display stand. I didn't have enough chocolate on hand to make a chocolate stand and thought nougatine would be a better vehicle for my cousins's wedding themes of red + gold and succulents. However, in retrospect, nougatine wasn't the best choice for an outdoor wedding. The display held up, but it sure got shiny and sticky! Next time I'm sticking with using isomalt instead of sugar, or just using something material.

Here is the making of the nougatine, from toasting the nuts, to cooking the sugar and rolling out / cutting the pieces:
 

Nougatine
Makes about a half sheet pan

Ingredients:
  • 600g granulated sugar
  • 250g sliced almonds, lightly toasted and warm

Directions
  1. Make a dry caramel (or wet, if you don't want too dark a nougatine) with the sugar in a saucepan.
  2. Stir in the warm, sliced almonds.
  3. Immediately pour mixture onto a nonstick silicone mat and spread as thinly as possible.
  4. Place a second map on top of the caramel and roll out as thin and even as possible. Begin this step as soon as your can handle the heat.
  5. Remove the top map, carefully life the nougatine sheet and place on cutting board or oiled parchment paper. If mat sticks, then caramel is still too hot.
  6. Using a knife or cutting mold, cut desired shape, working quickly. If nougatine is too cold to cut or shape, place back on silicone mat and into a 350 degree oven for just long enough to soften.
I was quite limited by the size of my oven at that time, which couldn't fit a full sheet pan, and thus limited the size of my cylinders and ovals. But, I'd like to think there was something "organic" or "artistic" about the pieces I built with :) I added succulent trimmings to my nougatine leaves/petals to tie everything together:

Monday, December 8, 2014

Thanksgiving | (Part 2) Apple Rose Tarts & Pumpkin Cake Tarts

 
Continuing with my theme of using ingredients I had on hand, I also made apple rose tarts and pumpkin cake tarts for Thanksgiving (for co-workers, Friendsgiving and the actual family get-together). Although quite simple in theory, the apple tart in particular can be labor intensive if you hand slice your apples like I did. I think I told myself I was practicing my knife skills . . . but I would recommend using a mandolin slicer if you've got one!

The apple tarts are inspired by my baking friend Anjali, who in turn was inspired by a Pinterest post. The crust is a Pâte Brisée, and the rose is made from thin slices of Gala apples, coated with some sugar, cinnamon, lemon juice and melted butter.
I also added an apple compote (using Golden Delicious apples) underneath the rose to add flavor and moisture, which I think makes a big difference. After baking, I brushed with some apricot nappage for a glaze.


The pumpkin tarts use a Pâte Sucrée crust, baked with the same pumpkin brown butter cake batter I used for my Thanksgiving cake.


After baking, I leveled the top of the tart-cake, brushed on the brown sugar simple syrup, and then topped with mascarpone mousse.
Both were tasty treats and great for gifting. My personal favorite is the apple tart!

Wednesday, December 3, 2014

Thanksgiving | (Part 1) Pumpkin Brown Butter Cake

For Thanksgiving this year, I made a pumpkin layered cake, inspired by . . . ingredients on hand. I recently moved, and while I am excited to have a more functional oven and kitchen, I haven't had time to organize the pantry or find all of my tools. Looking at what I had (canned pumpkin, nuts, butter, sugar, mascarpone mousse for Friendsgiving tarts), I decided to make this cake with brown butter sage pumpkin layers, butterscotch pecan filling and mascarpone mousse frosting, with white chocolate leaves and cake crumbs for decoration.

The brown butter sage pumpkin cake comes from Martha Stewart, the butterscotch pecan filling comes from annie's eats and the mascarpone mousse is one of my favorites from Extraordinary Desserts that I've used multiple times.

Brown Butter Pumpkin Cake with Butterscotch Pecan Filling
Makes one 9" cake, or 12 cupcakes

Filling: 

  • 1 cup granulated sugar
  • Small squeeze of fresh lemon juice (optional, helps prevent crystallization)
  • 1¼ sticks (5 oz.) unsalted butter, cubed
  • 1 cup heavy cream
  • 1 cup chopped toasted pecans
 Cake: 
  • ¾ cup (1 ½ sticks) unsalted butter
  • 1 ⅔ cups all-purpose flour
  • ¼ cup fresh sage (chiffonade)
  • 2 teaspoons baking powder
  • ½ teaspoon ground cinnamon
  • ¼ teaspoon freshly grated nutmeg
  • ⅛ teaspoon ground cloves
  • 1 teaspoon salt
  • 1 cup pumpkin puree
  • 1 cup packed light brown sugar
  • 2 large eggs
Also make mascarpone mousse (or any other frosting such as buttercream) and a simple syrup (try brown sugar).

Directions
  1. Preheat oven to 350 degrees.
  2. Make the cakeMelt butter in a saucepan over medium-low heat. Add sage strips and cook until butter turns golden brown, 5 to 8 minutes. Transfer mixture to a bowl; let cool slightly. Meanwhile, whisk together flour, baking powder, cinnamon, nutmeg, cloves, and salt. In another bowl, whisk together pumpkin, brown sugar, eggs, and sage-butter mixture. Add flour mixture; whisk until incorporated. Pour batter into floured pan; smooth top with an offset spatula. Bake until done (about 60 minutes, or when a cake tester comes out clean). Cool, wrap and chill in refrigerator or freezer.
  3. Make the fillingWarm heavy cream in a small saucepan (do not boil). In a medium saucepan, combine the sugar and lemon juice and stir with a whisk to combine (add water as necessary to resemble moist sand). [Note: If you're comfortable making a wet caramel, consider skipping the lemon juice. I added too much and ended up with a citrusy filling instead of a true butterscotch flavor.] Heat until sugar caramelizes into a golden amber color. Remove the saucepan from the heat and carefully add the heavy cream slowly, whisking constantly to incorporate. Whisk in the butter, a couple cubes at a time, stirring to incorporate completely before adding the next portion.
  4. Cool the butterscotch in the refrigerator at least 45 minutes, until the mixture is no longer warm and has a slight chill.  Place the chilled butterscotch in a stand mixer bowl and beat for about 2 minutes, until it has thickened and lightened. Fold in the chopped pecans.
  5. Cut cake into 3 layers. Brush cake layers with brown sugar simple syrup, spread filling, repeat, and cover cake with mascarpone mousse. Freeze until ready to decorate and serve. 

Monday, October 27, 2014

Birthday | Chocolate & Apples (Unlikely Pairing!)

Happy birthday this week to my friends Patricia and Chengos! I made this cake at the last minute for a potluck. The only guidance I had was "chocolate" and "maybe with fruit". I thought about what I was originally going to make (apple tarts), opened up my favorite cookbook, Extraordinary Cakes, and the first page I turned to was "New York, New York," a chocolate and apple cake. It was meant to be.

I don't often associate apples with chocolate, but add in a little caramelization and rum, and it all comes together.


I used the same sour cream chocolate cake that I used for my previous German Chocolate Cake, since I knew I could count on it for a flavorful and light texture. I brushed the cake with rum simple syrup and then layered it with rum-spiked chocolate ganache, chocolate chantilly (whipped chocolate cream), and caramelized Golden Delicious apples.
The assembled cake was then coated with chocolate ganache, and covered with a chocolate glaze for a smooth finish. Then I placed thinly sliced Golden Delicious apples around the sides and secured with a ribbon. I didn't have time to make additional decorations, so I arranged some fresh flowers on top.
Although you might expect this cake to be incredibly heavy, the lightness of the chocolate cake layers offsets the denseness of the ganache. I might skip the ganache filling layers in the future and save it just for the outer coating, but all in all, this was a unique and flavorful cake! Thin slices recommended for consumption ;)

Wednesday, October 22, 2014

Office Bytes | Maple Bacon Cream Puffs

I've been meaning to make some version of these cream puffs after a culinary friend of mine talked about making bacon profiteroles and described the magic of grinding various foods with sugar to create custom-flavored dusting sugars.


This took me a few tries, as I first tried making cream puffs with bacon fat instead of butter (I prefer the butter flavor), and then first ground up the rendered bacon with granulated sugar (I highly recommend maple sugar instead for a much better flavor pairing . . . something is a little off about bacon with regular sugar). Apologies to my friends who were guinea pigs on earlier iterations of this.
The final result used regular cream puffs, with maple flavored custard (crème légère with maple syrup), dipped in brown butter icing, with maple bacon sugar sprinkled on top. So good.

Thursday, September 4, 2014

Baby Shower | Congrats Amy & Tim!

I've had the pleasure of knowing Amy since elementary school, and her husband Tim since they began dating in college. I think I speak for all of their friends when I say, I can't wait for mini-Amy to arrive in November!!

To celebrate their upcoming baby girl, I made cake pops (a first for me) and cupcakes as party favors for guests to take home.
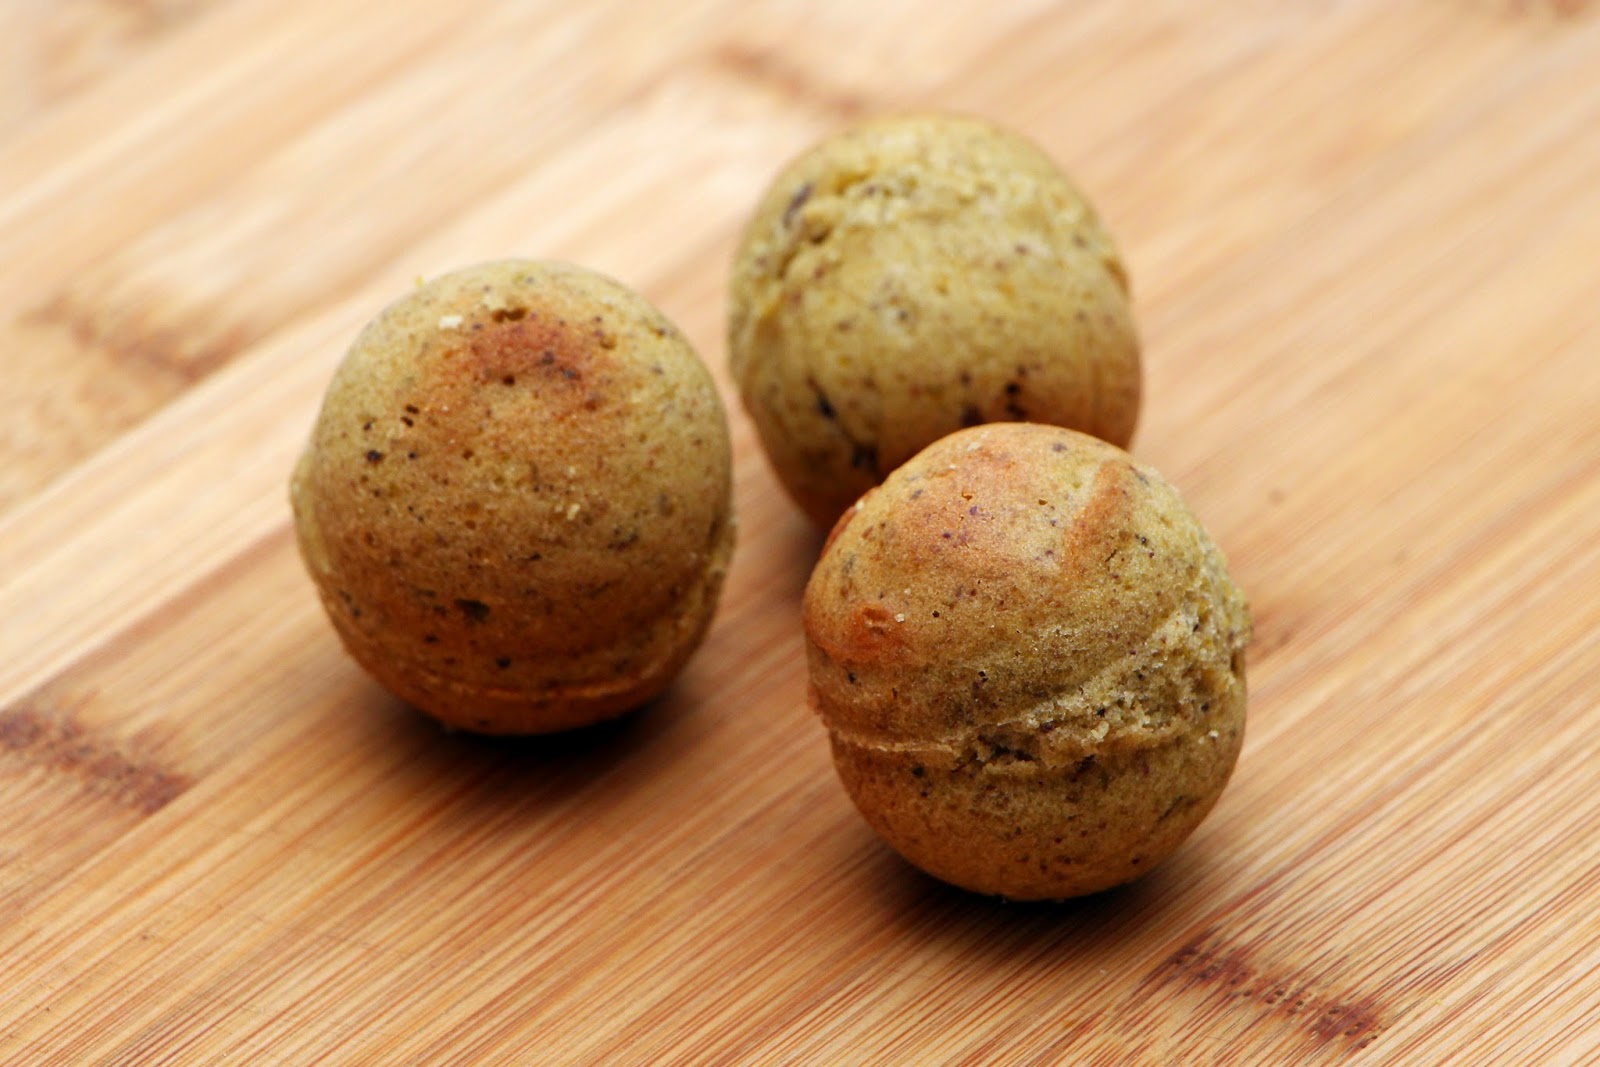
The cake pops are a browned butter pistachio financier, made with ground pistachios, flour, egg whites, and browned butter.
I brushed the cake with raspberry simple syrup and coated with white chocolate coating chocolate. It turns out you can make the spherical shapes of cake pops either by baking in a spherical mode, or pressing cake pieces into that shape. The latter results in a fudgier texture, and I might have gone that route if I had such a pressing mold. For these, I figured the financier would have sufficient density and texture.
It's a bit tricky to put the right amount of batter in the mold to make sure it fills the full sphere when baking but not push the molds apart. Fortunately I had enough successful pieces to meet the guest count :)

The cupcakes are a play off of the Beau Soleil cake I made recently.
For the cake, I made a cinnamon swirl sour cream cake, brushed with orange simple syrup, filled with peach curd, and topped with mascarpone mousse.
Then I drizzled with honey and sprinkled with some praline. Although it used many of the same ingredients as the cake, it was delicious in its own way.

Wednesday, September 3, 2014

Birthday | German Chocolate Memories

When I asked Darren what type of desserts or flavor preferences he might have for his birthday, he was quick and precise in his answer: German Chocolate Cake.

It turns out that his mom would make him a German Chocolate Cake for his birthday when he was growing up and he wanted to continue that tradition for his celebration. I was happy to oblige of course, but talk about pressure to meet or exceed the expectations of childhood longing!

For this intimidating task, I turned to Cook's Illustrated for guidance, and as always, I'm glad I did. The Cook's Illustrated German Chocolate Cake uses whole eggs instead of separated eggs, which the kitchen testers found actually improves the cake texture. I also think the use of sour cream instead of milk/heavy cream has something to do with this, as the sour cream gives the batter a luscious thickness and structure that helps prevent any cake sinking.
The end result was a cake with a fine crumb and silky melt-in-your-mouth experience, and a very distinctively chocolate taste. I highly recommend this cake!
The coconut-pecan filling was great too, but honestly most recipes for the filling should be relatively good. I recommend toasting both the coconut and pecans before mixing for enhanced flavor.

I cut two 10" cakes in half for 4 cake layers, each brushed with rum simple syrup, and topped with coconut-pecan filling. I then coated the sides of the layered cake with dark chocolate frosting. I originally intended to make small tempered chocolate cut-outs for a geometric decoration, but ran out of time. Hopefully I can execute that vision sometime in the future.
Finally, for presentation, I made a "Happy Birthday" using two birthday candles, some cardstock and spray glue (one of my favorite crafting items every). It's hard to say how this cake stacked up to all German Chocolate cakes that came before, but the birthday boy and guests were happy, and that makes me happy!